
Removing a BMW radiator requires careful planning and proper tools to avoid damaging the cooling system. This guide outlines the necessary steps and precautions to successfully complete the task without professional assistance.
Essential Tools for BMW Radiator Removal
Before tackling the removal of a BMW radiator, it’s crucial to gather the right tools to ensure a smooth and efficient process. This section outlines the essential equipment you’ll need to successfully complete the job, minimizing the risk of damage and maximizing your chances of a successful DIY cooling system repair.
Before starting the removal process, ensure you have all required tools and supplies on hand. This preparation minimizes downtime and allows for a smoother workflow. Key items include:
Socket set with various sizes
Wrenches for hose clamps
Pliers for removing clips
Coolant for refilling
Drain pan to catch old coolant
Safety goggles and gloves
| Tool/Supply | Purpose |
|---|---|
| Socket set | Remove bolts |
| Wrenches | Tighten hose clamps |
| Pliers | Remove clips |
| Coolant | Refill system |
| Drain pan | Catch coolant |
| Safety gear | Protect during work |
Recommended Products

Genuine BMW Antifreeze/Coolant
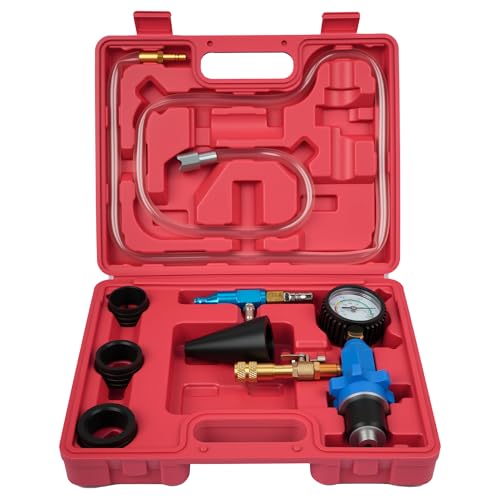
Pneumatic vacuum coolant filler first sucks and forms a vacuum on the cooling system by using shop air, then draws coolant into the cooling system. Add coolant in vacuum, there is no large air pocket and avoid warping or other damage in engine. Normally, it takes 5-10mins to refill the coolant, the exact time depends on the size of the tank. Easy to operate and save time
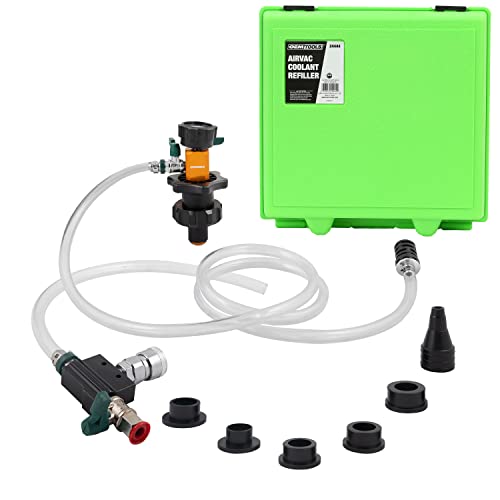
Efficient Cooling System Refill: The OEMTOOLS 24444 cooling system pressure tester kit quickly refills your vehicle's cooling system while eliminating trapped air, preventing engine damage.
Vehicle Preparation for Radiator Removal
Before tackling the removal of a BMW radiator, it’s essential to prepare your vehicle properly. This preparation ensures a smoother process and helps prevent potential damage to surrounding components. Taking the time to follow these steps will set the stage for a successful DIY cooling system repair.
Preparation is crucial for a successful radiator removal. Start by parking the vehicle on a flat surface and ensuring the engine is cool.
Disconnect the battery to prevent any electrical issues. Follow these steps:
Open the hood and locate the radiator.
Remove the front grill if necessary for better access.
Drain the coolant by opening the drain valve or removing the lower hose.
Always allow the engine to cool before draining coolant to avoid burns.
Disconnecting Radiator Hoses and Wiring
Before removing the radiator from your BMW, it’s essential to disconnect the hoses and wiring properly to prevent any damage or leaks. This step ensures a smooth removal process and prepares you for the next phase of your DIY cooling system repair. Follow these guidelines to safely detach the components without compromising your vehicle’s integrity.
Once the vehicle is prepared, proceed to disconnect the hoses and electrical connections attached to the radiator. This step is essential to prevent leaks and ensure a clean removal. Follow these actions:
Loosen the hose clamps using a wrench or pliers.
Carefully pull off the upper and lower hoses from the radiator.
Disconnect any electrical connectors linked to the radiator fan or temperature sensor.
Radiator Removal Techniques for BMW
Removing the radiator from a BMW requires careful attention to detail and a solid understanding of the vehicle’s cooling system. This section will explore effective techniques tailored specifically for BMW models, ensuring a smooth and efficient removal process. By following these methods, you can tackle this DIY repair with confidence and precision.
With all connections detached, you can now focus on removing the radiator itself. This step requires careful handling to avoid bending or damaging the radiator. Execute the following:
Unbolt the radiator from its mounting brackets using the socket set.
Lift the radiator straight up and out of the engine bay.
Place the radiator in a safe location to prevent damage.
Recommended Products
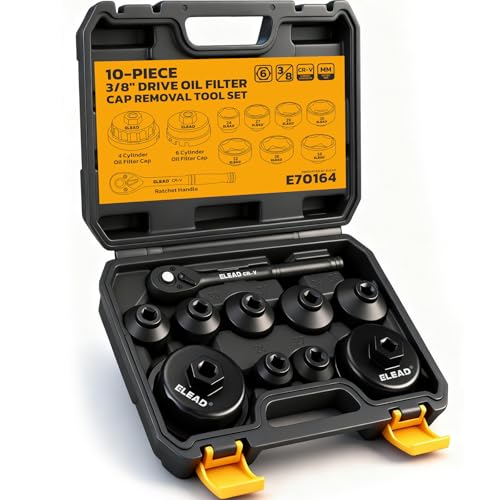
UNIVERSAL COMPATIBILITY - Fits Toyota, BMW, Honda, Mercedes, and Ford models, covering 7 essential metric sizes (24-38mm) for canister-style filter housings - perfect for DIY oil changes and professional shop use

Universal Complete Set: This oil filter wrench set multiple sizes includes a 3/8" drive ratchet, a 3-inch extension pole, and nine common-size oil filter sockets (24, 27, 29, 30, 32, 36, 38, 64, 64.5 mm). It meets the needs of DIY oil changes and is suitable for use in professional repair shops

360° Universal Swivel Design for Tight Spaces: Unique universal joint construction enables 360° free rotation of the socket head, gliding effortlessly in narrow, hard-to-reach engine compartments. No more struggling with fixed sockets—flexible operation for every repair scenario, making spark plug work fast and obstacle-free.
Install the New Radiator
Installing a new radiator in your BMW is a crucial step in ensuring your vehicle’s cooling system operates efficiently. This process not only helps prevent overheating but also enhances overall engine performance. Follow these detailed instructions to successfully replace your radiator and maintain your vehicle’s reliability.
After successfully removing the old radiator, it’s time to install the new one. Ensure the replacement radiator is compatible with your BMW model. Follow these steps:
Position the new radiator in the engine bay.
Secure it with bolts to the mounting brackets.
Reconnect the hoses and electrical connections.
Tighten all clamps and connectors securely.
Recommended Products

Vehicle Fitment: for BMW X3 2.5i 2004 2005 2.5L 3.0L L6, for BMW X3 3.0i 2004 2005 2006 2.5L 3.0L L6, for BMW X3 3.0si 2007 2008 3.0L L6, for BMW X3 xDrive30i 2009 2010 3.0L L6, for Automatic Transmission, not suitable for Manual Transmissio,

Compatible with BMW X3 2004-2010 L6 2.5L/3.0L

Vehicle Fitment: for BMW 325Ci 2001-2006 Base 2.5L L6 - Gas, for BMW 330Ci 2001-2006 Base 3.0L L6 - Gas, for BMW 325i 2001-2005 Base 2.5L L6 - Gas, for BMW 325xi 2001-2005 Base 2.5L L6 - Gas,for BMW 330i 2001-2005 Base 3.0L L6 - Gas,for BMW 330xi 2001-2005 Base 3.0L L6 - Gas,for BMW 323Ci 2000 Base 2.5L L6 - Gas, for BMW 323i 1999-2000 Base 2.5L L6 - Gas, for BMW 328Ci 2000 Base 2.8L L6 - Gas, for BMW 328i 1999-2000 Base 2.8L L6 - Gas etc.
Cooling System Refill Procedure
After successfully removing the radiator from your BMW, it’s essential to properly refill the cooling system to ensure optimal performance. This step-by-step guide will walk you through the correct procedure for refilling the cooling system, helping to prevent air pockets and maintain the efficiency of your vehicle’s engine. Follow these instructions carefully for a seamless repair process.
After installation, refilling the cooling system is the next critical step. Proper coolant levels are essential for engine performance. Follow these actions:
Fill the radiator with the appropriate coolant mixture.
Start the engine and let it run for a few minutes.
Check for leaks around the hoses and connections.
Top off the coolant if necessary.
Test the Cooling System Functionality
Once the radiator has been removed, it’s crucial to assess the overall functionality of the cooling system. This step ensures that any underlying issues are identified and addressed, preventing future overheating or performance problems. Proper testing will help confirm that the system operates efficiently before reassembly and refilling.
Testing the cooling system ensures the new radiator is functioning correctly. This step is vital to confirm that there are no leaks or issues. Execute the following:
Monitor the temperature gauge while driving.
Check for leaks under the vehicle after driving.
Inspect the coolant level after a few days of use.
If the temperature gauge rises above normal, stop the vehicle immediately to prevent engine damage.
Post-Installation BMW Radiator Troubleshooting
After successfully installing a new radiator in your BMW, it’s crucial to ensure everything is functioning properly. This section will guide you through essential troubleshooting steps to identify and resolve any issues that may arise post-installation. By following these tips, you can maintain optimal performance and prevent potential cooling system failures.
If problems arise after installation, troubleshooting can save time and effort. Common issues include:
Overheating engine: Check for air pockets in the cooling system.
Coolant leaks: Inspect all connections and hoses for tightness.
Poor heating: Ensure the heater core is not blocked.
By following these guidelines, you can effectively remove and replace a BMW radiator, ensuring the cooling system operates efficiently.

Evan Armstrong is a lead automotive engineer at Car Troubleshooters with over 15 years of experience in the automotive industry. He has a Master's degree in Automotive Engineering and a deep understanding of how cars work and what it takes to fix them.