
To fix a broken door handle latch on a 1999 GMC Sierra, you need to replace the latch assembly. This process involves removing the door panel, disconnecting the old latch, and installing a new one to restore functionality.
Symptoms of a Broken GMC Sierra Door Latch
When the door latch on your 99 GMC Sierra malfunctions, it can lead to a range of frustrating symptoms that affect your vehicle’s accessibility and security. Recognizing these signs early can help you address the issue before it escalates, ensuring your truck remains functional and safe. Understanding these symptoms is the first step toward a successful repair.
A malfunctioning door handle latch can present several symptoms. Understanding these signs helps in diagnosing the issue effectively. Common symptoms include:
Door not opening from inside or outside
Handle feeling loose or wobbly
Visible damage to the latch mechanism
| Symptom | Primary Suspect | Difficulty 1-5 |
|---|---|---|
| Door won’t open | Broken latch | 3 |
| Handle feels loose | Worn components | 2 |
| Visible damage | Corroded parts | 4 |
GMC Sierra Door Handle Latch Failure Reasons
Understanding the reasons behind a GMC Sierra door handle latch failure is crucial for effective repairs. Common issues can stem from wear and tear, environmental factors, or manufacturing defects. Identifying these causes will help you address the problem efficiently and ensure your door handle operates smoothly again.
Identifying the root cause is essential for a successful repair. The latch mechanism can fail due to several factors:
Wear and Tear: Over time, components can wear down, leading to failure.
Corrosion: Exposure to moisture can cause rust, affecting the latch’s operation.
Improper Installation: Previous repairs may have been done incorrectly, leading to current issues.
A thorough inspection of the latch and surrounding components will help pinpoint the exact cause.
Essential Tools for GMC Sierra Door Repair
When tackling the repair of a broken door handle on a 99 GMC Sierra, having the right tools is crucial for a smooth and efficient process. This section outlines the essential tools needed to successfully replace the broken latch, ensuring you can complete the job without unnecessary complications. Equip yourself properly to make the repair straightforward and effective.
Before starting the repair, ensure you have all required tools and parts. This preparation will streamline the process. You will need:
Screwdriver set
Pliers
Replacement latch assembly
Trim removal tool
Safety goggles
Having these items on hand will minimize interruptions during the repair.
Recommended Products

DIRECT OEM REPLACEMENT: Matches OEM part numbers 15758171-MTL, 15758172-MTL, 79100, 79107, GM1520115, GM1521115, ensuring a perfect fit and optimal functionality for both rear doors (driver side and passenger side) of the extended cab of your vehicle.

【Enhance Car's Grade】The chrome tail gate door handles can help you make your tailgate unique, shine your handle. Our new tailgate lock has beautiful silver to enhance your car's grade, stand out from the crowd, and exactly OEM design to easy installation.
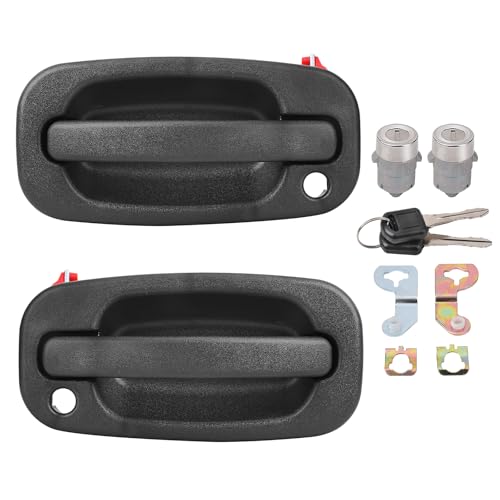
[PERFECT FITMENT & COMPATIBILITY] Precisely engineered for 1999-2006 Chevy Silverado/GMC Sierra 1500 2500 3500 (Including 2007 Classic), 2000-2006 Suburban/Tahoe/Yukon XL, 2002-2006 Avalanche/Escalade ESV EXT. A direct OEM replacement for 15034985, 15034986, 19356468, 19356471, 15298924, GM1311129, and GM1310129. Please verify your vehicle’s year and model before purchasing to ensure 100% compatibility.
GMC Sierra Door Handle Latch Replacement Steps
Replacing the door handle latch on your 99 GMC Sierra can seem daunting, but with the right guidance, it becomes a manageable task. This section outlines the essential steps to help you diagnose and replace the broken latch, ensuring your door functions smoothly once again. Follow these instructions carefully to restore your vehicle’s accessibility and security.
Follow these steps to replace the broken latch on your GMC Sierra:
Remove the Door Panel
Use a trim removal tool to carefully detach the door panel.
Unscrew any fasteners securing the panel to the door frame.
Disconnect any electrical connectors for window controls or speakers.
Access the Latch Mechanism
Locate the latch assembly inside the door.
Remove any screws or clips holding the latch in place.
Carefully pull the latch away from the door.
Disconnect the Old Latch
Detach any rods or cables connected to the latch.
Remove the old latch completely from the door.
Install the New Latch
Position the new latch in the same location as the old one.
Reconnect any rods or cables to the new latch.
Secure the latch with screws or clips.
Reattach the Door Panel
Align the door panel back onto the door frame.
Reconnect any electrical connectors.
Secure the panel with screws and ensure it is properly seated.
GMC Sierra Door Handle Troubleshooting Tips
If you’re experiencing issues with your GMC Sierra door handle, identifying the root cause is essential for an effective fix. This section provides practical troubleshooting tips to help you diagnose common problems related to the door latch, ensuring you can tackle the repair with confidence and restore your vehicle’s functionality.
After installation, you may encounter issues that require troubleshooting. Here are some common problems and solutions:
Door Still Won’t Open
Check if the latch is properly aligned.
Ensure all rods and cables are connected securely.
Handle Feels Loose
Tighten any screws or fasteners that may have come loose.
Inspect for any worn components that may need replacement.
GMC Sierra Door Handle Maintenance Strategies
Maintaining the door handle of your 99 GMC Sierra is essential for ensuring its longevity and functionality. Regular checks and timely repairs can prevent more significant issues down the line. This section outlines effective strategies for keeping your door handle in top condition, helping you avoid the frustration of a broken latch.
To extend the life of your new latch, consider these maintenance tips:
Regularly Inspect: Periodically check for signs of wear or corrosion.
Lubricate Moving Parts: Use a silicone spray to keep the latch operating smoothly.
Protect from Moisture: If possible, park in a garage to minimize exposure to rain and snow.
Regular maintenance can prevent future issues and ensure reliable operation.
Testing Your GMC Sierra Door Handle Functionality
Before diving into the replacement process for your GMC Sierra’s door handle, it’s essential to assess its current functionality. Testing the door handle and latch mechanism will help you identify the specific issues at play, ensuring that you address the right problems and streamline your repair efforts. This diagnostic step is crucial for a successful fix.
After completing the installation and troubleshooting, test the door handle several times. Ensure it opens smoothly from both inside and outside. If any issues persist, revisit the installation steps to confirm everything is secure and properly aligned.
Evan Armstrong is a lead automotive engineer at Car Troubleshooters with over 15 years of experience in the automotive industry. He has a Master's degree in Automotive Engineering and a deep understanding of how cars work and what it takes to fix them.