
Are your headlights flickering after installing a new battery? Don’t fret, we’ve got you covered.
In this troubleshooting guide, we’ll help you pinpoint the common causes of this issue and provide step-by-step solutions.
You’ll learn how to:
- Check battery connections
- Test the alternator output
- Inspect the bulbs and wiring
- Resolve voltage regulator issues
Get ready to liberate yourself from those pesky flickering headlights!
Key Takeaways
- Alternator malfunction or faulty voltage regulator may cause headlights to flicker after installing a new battery.
- Poor electrical grounding or loose connections between the headlight circuit and vehicle’s ground can also lead to flickering headlights.
- Corroded or loose battery terminals should be cleaned and inspected to ensure proper connections.
- Checking the headlight switch, inspecting headlight bulbs and wiring, and resolving voltage regulator issues are important troubleshooting steps to address flickering headlights after installing a new battery.
Common Causes of Headlights Flickering
You may experience headlights flickering due to several common causes.
One possible cause is an alternator malfunction. The alternator is responsible for charging the battery while the engine is running. If the alternator isn’t functioning properly, it may not be able to provide a consistent power supply to the headlights, resulting in flickering. This can be due to a faulty voltage regulator or a worn-out alternator belt.
Another common cause of headlights flickering is faulty electrical grounding. Electrical grounding ensures that there’s a proper flow of electricity throughout the vehicle. If there’s a poor or loose connection between the headlight circuit and the vehicle’s ground, it can lead to intermittent power supply, causing the headlights to flicker. Checking and tightening the grounding connections can often resolve this issue.
To troubleshoot and fix the problem, it’s recommended to have a professional mechanic inspect your vehicle. They can perform a thorough diagnosis to determine the exact cause of the flickering headlights. Once the cause is identified, they can then proceed with the necessary repairs or replacements to ensure that your headlights function properly without any flickering.
Checking the Battery Connections
To ensure proper functioning of your headlights and avoid flickering, check the battery connections. Properly connected battery terminals are crucial for the electrical system of your vehicle to work efficiently. If there is a poor connection, it can lead to various issues, including flickering headlights. Follow these steps to troubleshoot and clean your battery connections:
| Steps to Troubleshoot and Clean Battery Connections | |
|---|---|
| Step 1: Inspect the battery terminals | Make sure the terminals are securely fastened to the battery posts. Look for any signs of corrosion or looseness. |
| Step 2: Disconnect the battery cables | Start by disconnecting the negative (-) cable first, followed by the positive (+) cable. Use a wrench or socket to loosen the terminal nuts. |
| Step 3: Clean the battery terminals | Use a wire brush or battery terminal cleaner to remove any corrosion or dirt from the terminals. Make sure to clean both the battery posts and the terminals thoroughly. |
| Step 4: Reconnect the battery cables | Begin by reconnecting the positive (+) cable first, followed by the negative (-) cable. Tighten the terminal nuts securely. |
| Step 5: Test the headlights | Start your vehicle and check if the headlights are still flickering. If the issue persists, further troubleshooting may be necessary. |
Taking the time to troubleshoot and clean your battery connections can help resolve the issue of flickering headlights. It is important to ensure a secure and clean connection between the battery and the electrical system to maintain proper functionality.
Testing the Alternator Output
To accurately assess the performance of your alternator and determine if it’s the cause of the flickering headlights, you can test the alternator output. The alternator is responsible for generating electrical power in your vehicle, and if it isn’t functioning properly, it can lead to voltage instability and potentially cause the headlights to flicker.
Testing the alternator output is a straightforward process that can help you identify any issues and decide if alternator maintenance or replacement is necessary.
To test the alternator output, you’ll need a multimeter. Start by turning off the engine and connecting the multimeter to the battery terminals, ensuring the positive and negative connections are correct. Next, start the engine and set the multimeter to the DC voltage setting. Measure the voltage across the battery terminals. A healthy alternator should produce a voltage between 13.5 to 14.5 volts. If the voltage is significantly lower or higher, it indicates a problem with the alternator output.
Testing the alternator output is an essential step in troubleshooting flickering headlights. By ensuring voltage stability, you can identify if the alternator is the culprit and take appropriate action to address the issue.
If the alternator output isn’t within the recommended range, consider seeking professional assistance for alternator maintenance or replacement to resolve the problem and restore the proper functioning of your vehicle’s electrical system.
Recommended Products

【Fitment】For-GMC Savana 2500 / 3500 V6 4.3L/6.0L 2018-2019, Sierra 1500 2014-2018, Sierra 1500 V6 4.3L 2014-2016, V8 5.3L/6.2L 2014-2019 limited 2019, Sierra 2500 / 3500 HD V8 6.0L 2015-2019, V8 6.6L 2015-2020; Yukon / Yukon XL V8 5.3L 2015-2020, V8 6.2L 2019-2020; For-Cadillac Escalade V8 6.2L 2018-2020, Escalade ESV V8 6.2L 2018-2020.
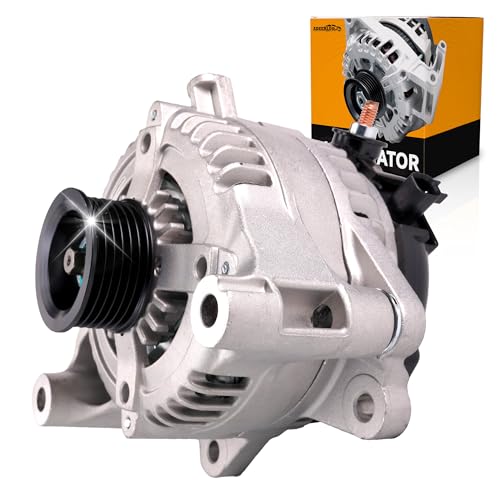
【Standards】Case Material: Aluminum; Amperage: 160 AMP; Voltage: 12 V; Pulley Groove Quantity: 6; Pulley Class: S6; Regulator: IR, Fan Type: IF; Rotation Direction: CCW (Counterclockwise); Cooling Method: Air; Same as OE; Number of Pieces: 1

【Standards】Case Material: Aluminum; Amperage: 130 AMP; Voltage: 12 V; Pulley Groove Quantity: 7; Regulator: IR, Fan Type: IF; Rotation Direction: CW(Clockwise); Cooling Method: Air; Same as OE; Number of Pieces: 1 (Notice:This one is an alternator equipped with a built-in regulator)
Inspecting the Headlight Bulbs and Wiring
Check both the headlight bulbs and the wiring to ensure they’re properly connected and functioning. Follow these steps to inspect the headlight bulbs and wiring:
- Testing the headlight switch: Start by turning on the headlights and checking if they turn on and off properly. If the headlights fail to turn on or flicker, it could indicate a faulty headlight switch. Use a multimeter to test the continuity of the switch and determine if it needs to be replaced.
- Checking the grounding of the headlight circuit: A poor or faulty ground connection can cause headlights to flicker. Inspect the ground wire connected to the headlight housing and ensure it’s securely attached to a clean and unpainted metal surface. Use a multimeter to test the continuity of the ground wire and repair or replace it if necessary.
- Inspecting the headlight bulbs: Remove the headlight bulbs and inspect them for any signs of damage or burnout. If a bulb is blackened or has a broken filament, it needs to be replaced. Additionally, check the bulb sockets for any signs of corrosion or loose connections.
Resolving Voltage Regulator Issues
To resolve voltage regulator issues, you should first identify any signs of malfunction and then take appropriate steps to address them. The voltage regulator plays a crucial role in maintaining a steady flow of electricity to the vehicle’s electrical system. If it malfunctions, it can cause flickering headlights and other electrical problems. Here are some steps you can take to resolve voltage regulator issues:
- Check for Signs of Malfunction: Look out for symptoms such as dimming or flickering headlights, fluctuating battery voltage, or issues with other electrical components.
- Inspect the Voltage Regulator: Locate the voltage regulator, which is usually mounted on or near the alternator. Inspect it for any visible signs of damage or loose connections.
- Adjust the Voltage: If the voltage output is not within the recommended range (usually around 13-14.5 volts), you may need to adjust the voltage regulator. Refer to your vehicle’s manual or consult a professional for guidance on how to perform this adjustment.
- Replace the Battery: In some cases, voltage regulator issues may be caused by a faulty battery. If you have already checked and ruled out other possible causes, replacing the battery might be necessary.
Here is a table that summarizes the steps to resolve voltage regulator issues:
| Steps | Description |
|---|---|
| Check for Signs of Malfunction | Look for dimming or flickering headlights, fluctuating battery voltage, or other electrical issues. |
| Inspect the Voltage Regulator | Check for damage or loose connections on the voltage regulator. |
| Adjust the Voltage | If the voltage output is not within the recommended range, adjust the voltage regulator. |
| Replace the Battery | If all other possibilities have been ruled out, consider replacing the battery. |
Frequently Asked Questions
Can Headlights Flickering Be Caused by a Faulty Fuse?
If you’re experiencing headlight flickering, a faulty fuse could be the culprit. Check the fuse box for any blown fuses and replace them if necessary. This simple fix can resolve the issue and liberate you from the frustration of flickering lights.
What Are Some Signs of a Weak Alternator That May Cause Headlights to Flicker?
If your headlights are flickering after installing a new battery, it could be a sign of a weak alternator. Signs include dimming lights, a dead battery, and difficulty starting the engine. To fix the issue, have your alternator checked and potentially replaced.
Is It Possible for a Loose or Corroded Ground Wire to Cause Headlights to Flicker?
Yes, a loose or corroded ground wire can cause headlights to flicker. To troubleshoot, check the ground wire connections for looseness or corrosion. Clean or tighten as needed to ensure a secure connection.
Can Using Low-Quality or Incompatible Headlight Bulbs Lead to Flickering Issues?
Using low-quality or incompatible headlight bulbs can cause flickering issues. It’s important to choose bulbs that are compatible with your vehicle’s electrical system to avoid voltage fluctuations and extend the lifespan of your bulbs. Additionally, a faulty headlight relay can also contribute to flickering problems.
Could a Malfunctioning Dimmer Switch Be the Cause of Headlights Flickering After a New Battery Installation?
Is a malfunctioning dimmer switch causing your headlights to flicker after installing a new battery? Don’t fret! Our troubleshooting guide will help you pinpoint the issue and liberate you from this annoyance.
Evan Armstrong is a lead automotive engineer at Car Troubleshooters with over 15 years of experience in the automotive industry. He has a Master's degree in Automotive Engineering and a deep understanding of how cars work and what it takes to fix them.